[Answer ID: 13688]
How can I replace a hard drive and rebuild a RAID array in the LinkStation? (LS-WVL, LS-WXL)
Follow the steps below to replace a failed hard drive.
If a drive in your LinkStation fails, identify the failed drive from Settings(*) by navigating to [System] – [Storage]. Replace it with a Buffalo Technology OP-HD series drive of the same capacity, available from www.buffalotech.com.
Drives in RAID 1
When the RAID is rebuilt, your data is copied to the new drive. No data is lost in this case.
If the other drive fails before your new drive is installed, all data on the array will be lost.
Drives in RAID 0 or normal mode
All data on the failed drive and any array that it was part of is lost.
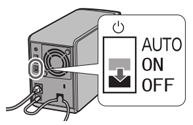
| 1. |
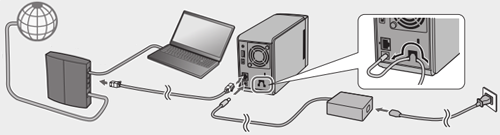
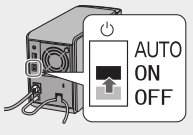
Shut down the LinkStation by setting the switch to the Off position, then remove all cables.
|
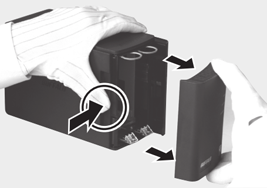
| 2. |
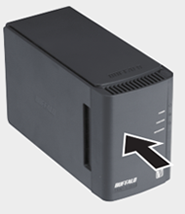
Remove the front cover.
|
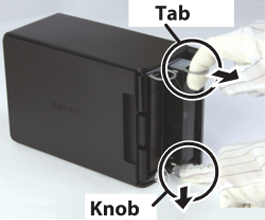
| 3. |
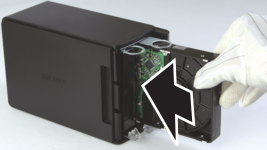
Pull out the tab above the failed drive while pressing the release below the drive. The tab will slide out approximately 2 cm (1 inch).
|
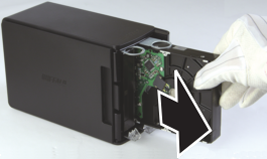
| 4. |
Remove the failed drive.
|
| 5. |
Insert the new drive until it clicks.
|
| 6. |
Replace the front cover.
|
| 7. |
Reconnect all cables.
|
| 8. |
Power on the LinkStation.
|
| 9. |
If your LinkStation is in RAID 0 or RAID 1, navigate to [System] - [Storage] - [RAID Array] in Settings. Highlight the RAID array, then click [Rebuild RAID array].
Note: |

The LinkStation is now ready to use.
Note:
For more details, see the separate document "Hard Drive Replacement Procedure", available from the link below.
LinkStationTM Duo - LS-WXL
Click here.
LinkStationTM Pro Duo - LS-WVL
Click here.
Details