[Answer ID: 14632]
How to : iPhoe or iPad Touch clients can access home or office network resources such as NAS from Internet trough VPN ?
Buffalo Router (User Friendly Firmware) supports NAS function. User Friendly Firmware has a built in WebAccess feature which allows access from Internet to NAS device through WEB Interface.
To learn more about WEB Access Setup using User-Friendly F/W see the following link: (1)(2) (3).
Alternatively, Internet access to NAS can be accomplished through VPN connection. The following is the instruction on how to setup a VPN server to access NAS from internet using iPhone or iPad Touch.
To explore shared files shared on netowork hosted by PC or NAS , an iOS supported samba client software is required (such as FileBrowser or NetPortal ).
root
1) Setup The NAS Start by attaching USB Storage to the router .
To Configure NAS on USER-Friendly:
- Navigate to NAS | Disk Management to see detected USB storage
- Click NAS | "User Management" tab to create a NAS user accounts : Enter User name and password
- Navigate to : NAS | "Shared Folder" . Set limits if needed.
To Configure NAS on Professional:
- Connect Storage device to router USB port.
- Connect PC to Router and launch browser to management WEB UI.
- Log-in and navigate to Service | USB tab and enable : Core USB Support, USB Storage, and Automatic Drive Mount. Next click Apply Settings.
- Navigate to Service | NAS tab and under File Sharing Enable Samba.
- Under Shares select mount path and set shared folder name and access .
- Under Users, Click “Add User”. Enter user name and password.
2) Setup VPN Server (PPTP) To Configure VPN on USER-Friendly (see details):
- After you setup Internet connection, go to WEB UI diagnostic and record your WAN or Internet IP.
- Register for Dynamic DNS with DynDNS or TZO . DynDNS and TZO have dynamic DNS service which translate your unique domain name "yourhostname.domainname.com" to the temporary global IP given by ISP.
- Go to "WAN/LAN" | "DDNS" tab and select the DNS service you will be using. Next enter your service account information.
- To Setup VPN Server, Navigate to "WAN/LAN" | "VPN Server"
Please pay attention to IP address settings. If Server network is to be connected to another network, to avoid duplicate IPs, set client IP such that it is allocated from none-overlapping IP pool .
Next, check Enable VPN option and push "Apply" Button.- To create a list of users that can access the network through VPN, click "Edit PPTP user list"
Enter user name and password. Next, push "Add User" button. Keep a record of User name and passwordsTo Configure VPN on Professional (see details):
- Login to management WEB UI and Navigate to Setup tab and record IP address. A) LAN IP address (example: 192.168.11.1) B) DHCP address pool (Example: 192.168.11.100 ~ 192.168.11.149)
- Go to "Service" | "VPN" tab
- Click enable PPTP server Enable option.
- Set enable broadcast option if you are using it for small home/office and/or for special gaming applications.
- optional, Set DNS1 , DNS2 and WINS IP address.
- Set Server IP address. This should be a valid IP address in LAN address rang (i.e. 192.168.11.X) . where X is out side of the DHCP address pool to avoid duplicate IP address.
- The IP address should be outside of the DHCP address pool. ( in this example DHCP address range is 192.168.11.100 ~ 192.168.11.149)
- Server IP is set to 192.168.11.50.
- Allocate an address or a list of addresses for client IP . This should be a valid IP address in LAN address rang and out side of DHCP address range.
- (Example 192.168.11.X -- in this example; 192.168.11.60 or if there are more you may specify a range as 192.168.11.60-80)
- Assign user name password (CHAP secret) : Username * Password *
- Click "Apply Settings"
- Finally reboot the router.
3) Setup VPN Client on iOS (iPhone or iPad touch)
- To Configure VPN client on iOS, Navigate to : Settings | General | Network |VPN .
- Choose Add VPN Configuration and select PPTP tab.
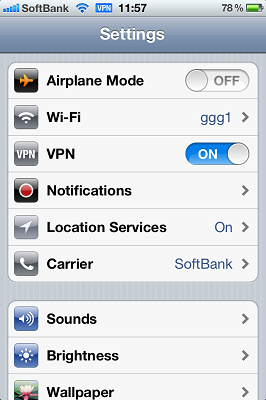
Description Enter a short string describing the connection Server Enter public IP address to Router or the registered dynamic domain name . Account Enter User name for PPTP/VPN previously created on router. RSA SecurityID leave as is off Password Enter User's password for PPTP/VPN account Encryption Level leave as is Auto click Save button. To connect, from settings VPN select ON . alternatively, Navigate to Settings | General > | Network | VPN and select VPN connection configuration to connect.
4) Setup File sharing (samba) Client on iOS (iPhone or iPad touch) Install and use any 3rd party samba client to explore the file system. Shared folder on Router NAS can be accessed by router's LAN IP address (example 192.168.11.1).
Details