[Answer ID: 15124]
LinkStation 400 - How to Connect a Printer to Your LinkStation
You can connect a printer to the USB port on the LinkStation.
Settings up a Printer with Windows 8, Windows 7, or Windows Vista
Setting Up a Printer with Windows XP
Notes:
| • | Only one USB printer can be connected to the LinkStation. |
| • | Bidirectional communication is not supported i.e., remaining ink quantities and other printer status information is not supported. |
| • | If a multifunctional printer is connected, only the printer function can be used. Other functions such as scanning will not be available. If you need bidirectional communication or multifunction features such as scanning to work, connect the printer with USB Device Server instead. |
| • | The print server does not support Mac OS. |
Settings up a Printer with Windows 8, Windows 7, or Windows Vista
| 1. |
Connect a printer to the LinkStation's USB port, then turn the printer on.
|
| 2. |
In Advanced Settings, click [Services].
|
| 3. |
Move the Print Server switch to the
|
| 4. |
Refer to the manual supplied with the printer and install the printer drivers.
|
| 5. |
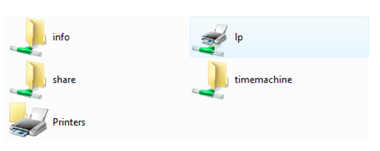
Launch NAS Navigator2. Double-click your LinkStation's icon.
|
| 6. |
Double-click the icon of the connected printer (shared name is displayed).
|
| 7. |
Click [OK].
|
| 8. |
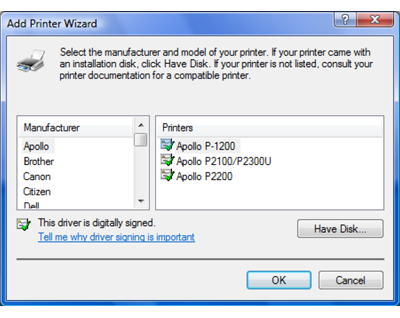
Select your printer, then click [OK].
|
| 9. |
Register the printer.
|

 position to enable the Print Server.

Setting Up a Printer with Windows XP
| 1. |
Connect a printer to the LinkStation's USB port, then turn the printer on.
|
| 2. |
Click [Services] in Advanced Settings.
|
| 3. |
Move the Print Server switch to the
|
| 4. |
Refer to the manual supplied with the printer.
|
| 5. |
Launch NAS Navigator2, then double-click your LinkStation's icon.
|
| 6. |
Double-click your printer icon.
|
| 7. |
When "The server for the printer does not have the correct printer driver installed. If you want to search for the proper driver, click OK." displays, click [OK].
|
| 8. |
Select the driver connected to the LinkStation, then click [OK].
|
| 9. |
Register the printer.
|


Details