[Answer ID: 15146]
LinkStation 420, 421e - How can I replace a hard drive and rebuild a RAID array in the LinkStation?
If a drive fails, NAS Navigator2 and Settings will show an error message.
Follow this procedure to replace a failed hard drive with a Buffalo Technology OP-HD/LS series drive of the same size or larger capacity(*), available from www.buffalotech.com.
(*) If a larger drive is used, the extra space will not be usable in a mirrored RAID array.
|
Drives in RAID 1 When the RAID is rebuilt, your data is copied to the new drive. No data is lost in this case. If the other drive fails before your new drive is installed, all data on the array will be lost.
Drives in RAID 0 or JBOD All data on the failed drive and any array that it was part of are lost.
|
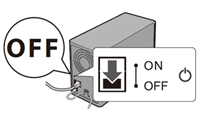
| 1. |
Turn the LinkStation off and remove all cables.
|
||||
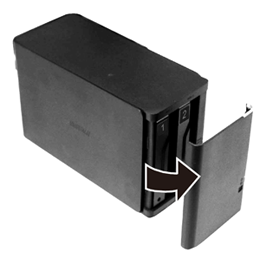
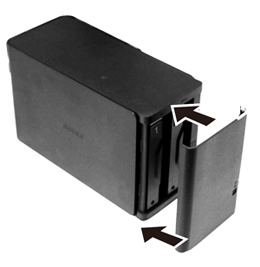
| 2. |
Squeeze the left side of the front panel and pull the panel off.
|
||||
| 3. |
Push the failed drive's cartridge up and remove it from the LinkStation.
Notes:
|
||||
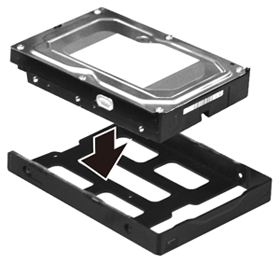
| 4. |
Remove the drive from the cartridge.
|
||||
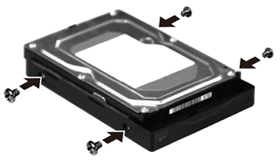
| 5. |
Install a new Buffalo OP-HD/LS series drive in the cartridge.
|
||||
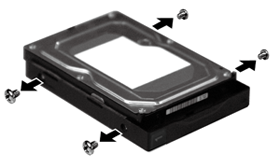
| 6. |
Replace the four screws.
|
||||
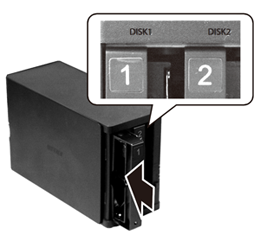
| 7. |
Insert the new drive in the empty slot.
|
||||
| 8. |
Close the front panel.
|
||||
| 9. |
Connect all cables, then turn on the LinkStation.
|
||||
| 10. |
For RAID 0
For RAID 1
For JBOD
|
||||

| Note: | If a new drive is not recognized after installing it, click [Rediscover Disk] in Settings. |
Details