[Answer ID: 15206]
TS4000 (enclosure) - Setting up the TeraStation
Hard drives are not included with TeraStation 4000 series. Before use, obtain hard drives and install them in the TeraStation. Firmware for installation is included on a USB recovery device.
| 1. |
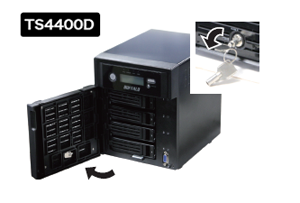
TS4800D, TS4400D, TS4200D: Open the front cover with the included key.
|
| 2. |
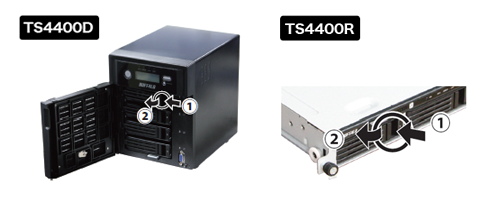
Squeeze the tab to the left on drive bay # 1 and swing out the drive lock.
|
| 3. |
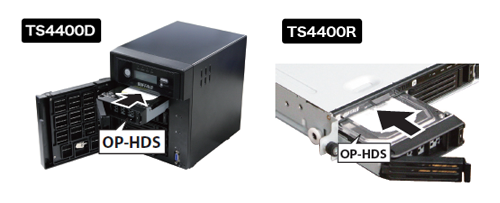
Insert the OP-HDS series hard drive (sold separately) into the empty slot from step 2 (Drive bay # 1).
|
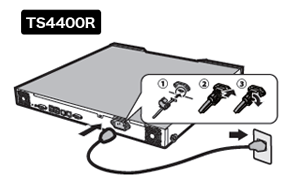
| 4. |
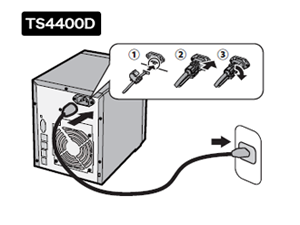
Slide the drive into the TeraStation, then swing the lock back down until it clicks into place. Connect the TeraStation with the power cable.
|
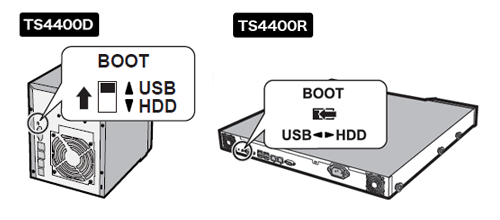
| 5. |
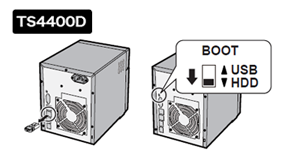
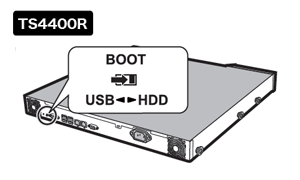
Set the Boot Mode switch on the rear to “USB”.
|
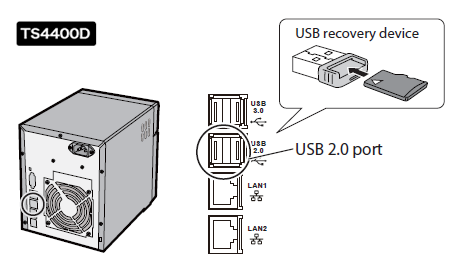
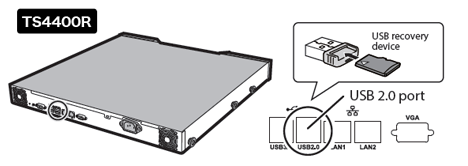
| 6. |
Connect the supplied USB recovery device to the USB 2.0 port of the TeraStation. Before connecting the supplied USB recovery device, be sure to remove any other USB devices connected to the TeraStation.
|
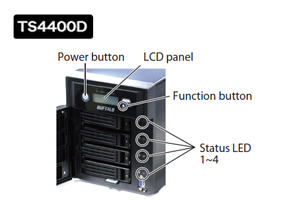
| 7. |
Press the power button. The LCD panel will light up as the TeraStation boots. When “Recovery I41 PushFuncToStart” is displayed on the LCD panel, press the function button. As the firmware is read, the LCD panel will show “Recovery I37 SystemRecovering”. While this message is displayed, all of the status LEDs are lit green. During installation, the TeraStation will reboot after the firmware files are read from the USB recovery device. The firmware will now install. When installation is complete, the TeraStation will shut down completely. After shutdown, the message on the LCD panel changes from “Recovery I38 RecoveryFinished” to “Recovery I39 Change Boot”. Updating the firmware will take about 10 minutes. Do not unplug or disconnect power until the update is complete.
|
| 8. |
Unplug the USB recovery device from the TeraStation and move the Boot Mode switch to “HDD”.
|
| 9. |
Press the power button to power on the TeraStation. If installing additional drives, insert each new drive into its bay in order by bay number. Do not skip any drive bays. If only bay # 1 has a drive installed, the LCD panel is backlit blue. If any other bays also have a drive installed, the LCD panel is backlit red. If a hard drive is not connected, its status LED will glow red.
|
| 10. |
TS4800D, TS4400D, TS4200D: Replace the front cover to the original location.
|
| 11. |
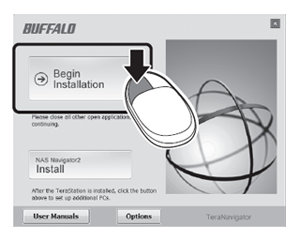
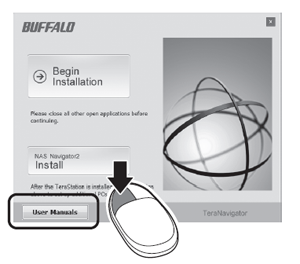
Insert the TeraNavigator CD into your computer. The setup wizard should launch automatically. If not, open the CD and double-click on the TeraStation icon.
|
| 12. |
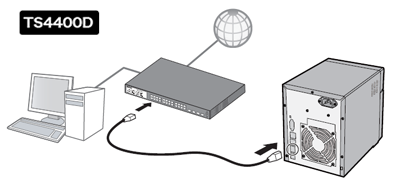
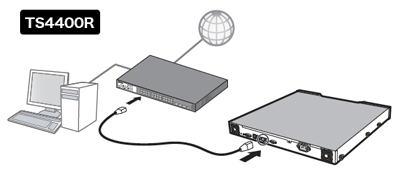
The wizard will guide you through connecting your TeraStation and installing NAS Navigator2. Follow the steps on the screen to connect the TeraStation's Ethernet and power cables and turn it on.
|
| 13. |
Configure the TeraStation’s IP address with NAS Navigator2 and its clock in Settings. For more detailed information, refer to the TeraStation user manual, available from the link in the software on your TeraNavigator CD or for download from www.buffalo-technology.com. Your computer must be connected to the Internet to access or download the user manual. Before using the TeraStation, use Settings to format the hard drives, set the RAID mode, and create shared folders.
|


Notes:
For product specifications, please refer to www.buffalo-technology.com. Weight and power consumption will depend on the installed hard drives' specifications.
| • | During installation, any data on the drives will be deleted. |
| • | Do not add a hard drive that has previously been used in a LinkStation or TeraStation. |
| • | For best results, use Buffalo OP-HDS series hard drives (sold separately). |
| • | All drives in a RAID array should be identical. |
| • | At least one drive must be installed in the TeraStation during firmware updates. |
| • | Use the supplied USB recovery device when performing setup for the first time only. |
| • | The TeraStation is fragile and should be handled with care. |
| • | Watch out for sharp metal edges during installation. |
| • | Do not disassemble or modify any components when replacing a hard drive as this will void your warranty. |
| • | To avoid damaging the TeraStation with static electricity, ground yourself by touching something made of metal before handling any sensitive electronic parts. |
Details